Saturday, March 3, 2012
Illustrator Tutorial: How to Make an Icy Cocktail
Do you like this story?

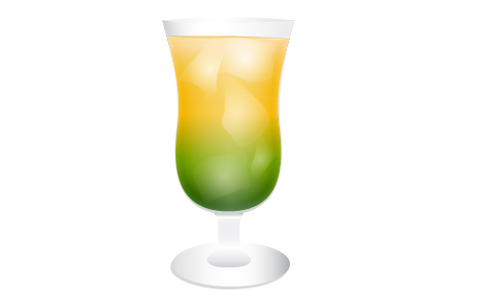
Do you desire to drink an icy refreshing cocktail on a sunny day? I know I am, so in this Illustrator tutorial, I will explain how I draw a refreshing cocktail drink in Adobe illustrator. Hope you will find this useful and inspiring to make other kinds of drinks or cocktails.
Drawing the Glass Shape
Open a new document, any size, RGB mode. Take the Pen tool and draw the shape that you see in the image below or just draw half of it and then reflect it to be symmetrical, like I did. Fill it with the linear gradient shown. Colors are: (230,230,230) or 10% black; white (255,255,255) and (204,204,204) 20% black.
Now copy and paste in front this shape. Take the Direct Selection tool and select the upper point of the shape and drag it a bit down like in the image. Make the same with the lower point of the shape. Then fill it with the linear gradient shown using the colors: (191,191,191) or 25% black; white (255,255,255) and (230,230,230) 10% black.

Next, copy and paste in front of the shape again and make it a little smaller. Fill it with the linear gradient using the colors: (77,77,77) 70% black; white and (51,51,51) 80% black, then set it to Color Burn. We will use this shape again later to make the liquid inside the glass. You should get something like in the image below:

Drawing the Glass Legs
Now let’s make the ‘leg’ of the glass. Draw the shape from the image below or just half of it and reflect it, then fill it with the gradient shown: (204,204,204) 20% black; (230,230,230) 10% black; white; (242,242,242) 5% black and (153,159,164).
Drawing the Glass Foot
For the ‘foot’ of the glass take the Ellipse tool and draw the shape that you see in the image and fill it with the linear gradient. Colors I’ve used are: (230,230,230) 10% black; white and (178,178,178) 30% black. To create more depth, copy and paste the shape that we just made, fill it with a darker gray and place it like in the image below. Now, the glass should look like this:

Coloring the Drink
It’s time to color the drink. Copy the shape that I said we will use it for this part and fill it the gradient using the colors: (63,98,46); (85,124,62); (168,194,88); (248,211,103) and (251,232,191) or any other colors that you prefer. The original shape, set to Color Burn that we made, has to be on top of this one not the other way.
Next, draw a simple shape like the one below and fill it with a linear gradient using the orange from above and a darker one. This way we will get the surface of the liquid inside and a more realistic look for the cocktail.

Drawing the Ice Cubes
Now, we will make the ice cubes. Take the Pencil tool and draw some shapes like the ones below. Fill them with a radial gradient from white to black, set the mode to Screen and lower the opacity for each one of them. You can adjust this later also till you like what you see.

Now place them all on top of the glass shape and you should have now something like this:
Adding in Details for Ice Cubes
We will continue to add some details to the ice cubes. Take the Pencil tool, draw some random shapes and fill them using different shades of orange. If necessary, lower the opacity for each one of them.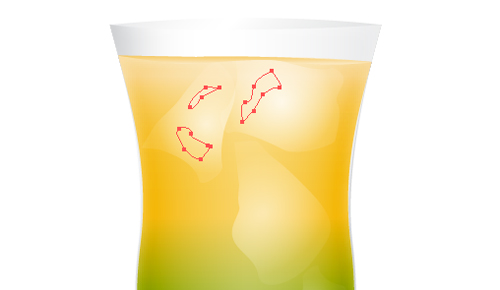
Creating Reflections
We will add some reflections in this step. With the Pen tool draw the shapes from the image below, fill them with a linear gradient using white and a similar green color to the one used for the liquid, then set the mode to multiply and lower the opacity.

Water Fizzles
To make the cocktail look more realistic, I decided to draw some water fizzles on the glass. With the Pen tool draw a shape like the one below or any other shape that will fit on top of the glass later. Copy and paste the shape and fill it with the linear gradient shown using black, white and gray. Place the second shape on top of the first one and go to Transparency panel and select Make opacity mask.

Now go to Effects/Pixelate/Mezzotint and select Fine Dots. Place the shape on top of the glass, set the mode to Screen and reduce the opacity till you get the icy effect that you like.


Water Droplets Dripping Effect
Take the Pen tool and draw a shape like the next one to make the water drop flow. Fill it with a linear gradient using the same colors like the drink inside the glass. Next, go to Effects/Pixelate/Crystallize and set the Cell size to 4, this will make the flow look more natural.

Now, place the shape on top of the water fizzles shape made earlier. Set the mode to multiply and lower the opacity.

Water Droplets
For the water droplets, take the Ellipse tool, draw 3 shapes, color them with (63,98,46) dark green; (179,202,109) light green and white, then place them on top of each other like in the image below. Go to Effects/Stylize/Drop Shadow and set the values like you see in the image and then group them all.

Placing the Water Droplets
Place the water drop like in the image and reduce the opacity to 25%. Copy one more water droplet and made it smaller to get a more realistic look.
We are done with this part and the cocktail should now look like the image below.

Drawing the Straw
It’s time to draw the cocktail accessories. With the Pen tool draw a shape like a straw. Fill it with white and a 0.5px light gray stroke.
With the Rectangle tool draw a small rectangle, fill it with green or other color that you prefer and drag it to the Brushes panel. Then I made the orange rectangle, we will need this one later for the second straw.

Next, draw a path with the Pen tool following the straw shape and stroke it using the green brush that we just made. Place it on top of the other one and make an Opacity mask. Copy the straw shape, select the path with the green stroke, double click the black square that you see in the image and paste the straw shape that we copied, then exit the mask mode. You should get something like in the image below.

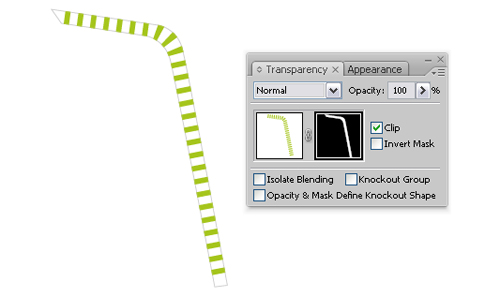
Now make another Opacity mask so the bottom of the straw looks more transparent when we will place it in the glass. You can adjust the mask later if needed.

Make the second straw like we did the green one. Then place them on top of the glass and adjust the Opacity mask for both of them to look realistic. I got something like this:


Drawing the Umbrella Stem
We will make the little umbrella for our cocktail. Use the brush from the Library that you see in the image, Expand appearance and fill it with a light brown. Copy and paste this shape, then delete the points except the 3 ones from the tip to make the little shape from the image. Copy and make 8 shapes that we will use later.
Drawing the Umbrella
Using the Pen tool draw a shape like the one below and fill it with a linear gradient using 2 green colors or other colors that you prefer. Draw some lines starting from the top and color them using a light and a dark green like in the image below.
Next, place the 8 shapes that we made earlier and draw with the Pen tool the little shape on top. The flower I used is from the Symbols Library and I set it to multiply. The umbrella is ready and should look like this:

Cocktail Stirrer
Next using the Ellipse tool and the Rounded Rectangle tool draw the cocktail stirrer. Fill them with a linear gradient. The colors that I have used are (244,237,203) and (244,187,58).
Final Cocktail
The final cocktail image is done. The final image of the cocktail looks like this:
Hope you have enjoyed this cocktail tutorial and find it useful and refreshing.


This post was written by: Franklin Manuel
Franklin Manuel is a professional blogger, web designer and front end web developer. Follow him on Twitter
Subscribe to:
Post Comments (Atom)


0 Responses to “Illustrator Tutorial: How to Make an Icy Cocktail”
Post a Comment